Set up LLMster
in a few minutes.
LLMster is the chat client. The model itself runs on a machine you control, served by LM Studio. This guide covers how the two connect, how to turn on LM Studio's local server and create an API key, and how to use the MCP integrations the app ships with.
Your app, your model,
your network.
There's no LLMster cloud in the middle. The app opens a direct connection to the LM Studio server you point it at, and your prompts travel straight there — and nowhere else.
LLMster
The native app on iPhone, iPad or Mac. It renders streaming, reasoning, tool calls and vision — but runs no model of its own.
Your network
A direct connection over your own Wi‑Fi or LAN, using LM Studio's local REST API. Optionally locked down with an API key.
LM Studio server
LM Studio — or the headless llmster daemon — loads the model and answers requests on your hardware.
Set up LM Studio.
Do this on the machine with the memory and GPU to spare — a desktop, a workstation, or a headless server in the closet. You only need to set it up once.
Install LM Studio
Download it from lmstudio.ai for Mac, Windows or Linux. On a machine with no display, install the headless llmster daemon instead — same server, no GUI.
Download a model
Open the Discover tab (⌘2 on Mac, Ctrl 2 elsewhere), search by name or paste a Hugging Face link, and download. Pick a 4‑bit (Q4) quantization or higher that fits your machine. For tool use or images, choose a model that lists those capabilities.
Prefer the terminal? lms get <model> downloads one without leaving the shell. Model download docs →
Start the server on your network
Open LM Studio's Developer page and its Server Settings. Confirm the Server Port (1234 by default), turn on Serve on Local Network so other devices can reach it, then start the server.
Require authentication & create an API key
Because the server is now reachable on your network, lock it down. In Server Settings, turn on Require Authentication, then open Manage Tokens → Create Token, give it a name, and copy the token — it's shown only once. You'll paste it into LLMster next. (Requires LM Studio 0.4.0 or newer.)
Note the host's address
Easiest: with Serve on Local Network on, LM Studio shows the server's reachable address right in Server Settings, with a button to copy it — something like http://192.168.1.20:1234 (the host's local IP plus the port). That's exactly what LLMster connects to. Prefer to find the IP yourself? On macOS, open System Settings → Network and select your active connection (or run ipconfig getifaddr en0 for Wi‑Fi); on Windows, run ipconfig and read the IPv4 Address.
Give it a static IP so it doesn't change. Your router hands out that address automatically and it can change after a reboot, which would break the server saved in LLMster. In your router's settings, add a DHCP reservation (sometimes called a static lease) that pins the IP to this machine — set it once and the address stays put.
No GUI on the host? The whole thing is one terminal session:
Point LLMster
at your server.
Open LLMster, go to Settings → Server, and fill in the two fields. On first launch the app brings you straight here.
- Server URL — enter the address from step 5, e.g. http://192.168.1.20:1234. Leave off the scheme and the app adds http:// for you.
- Auth Key — paste the token you created. It's stored in the device keychain and sent only to your server.
- Test Connection — tap it and you should see Connected, the number of models found, and the currently loaded model.
- Allow Local Network — the first time, iOS asks for local‑network access. Allow it, or the app can't reach the server.
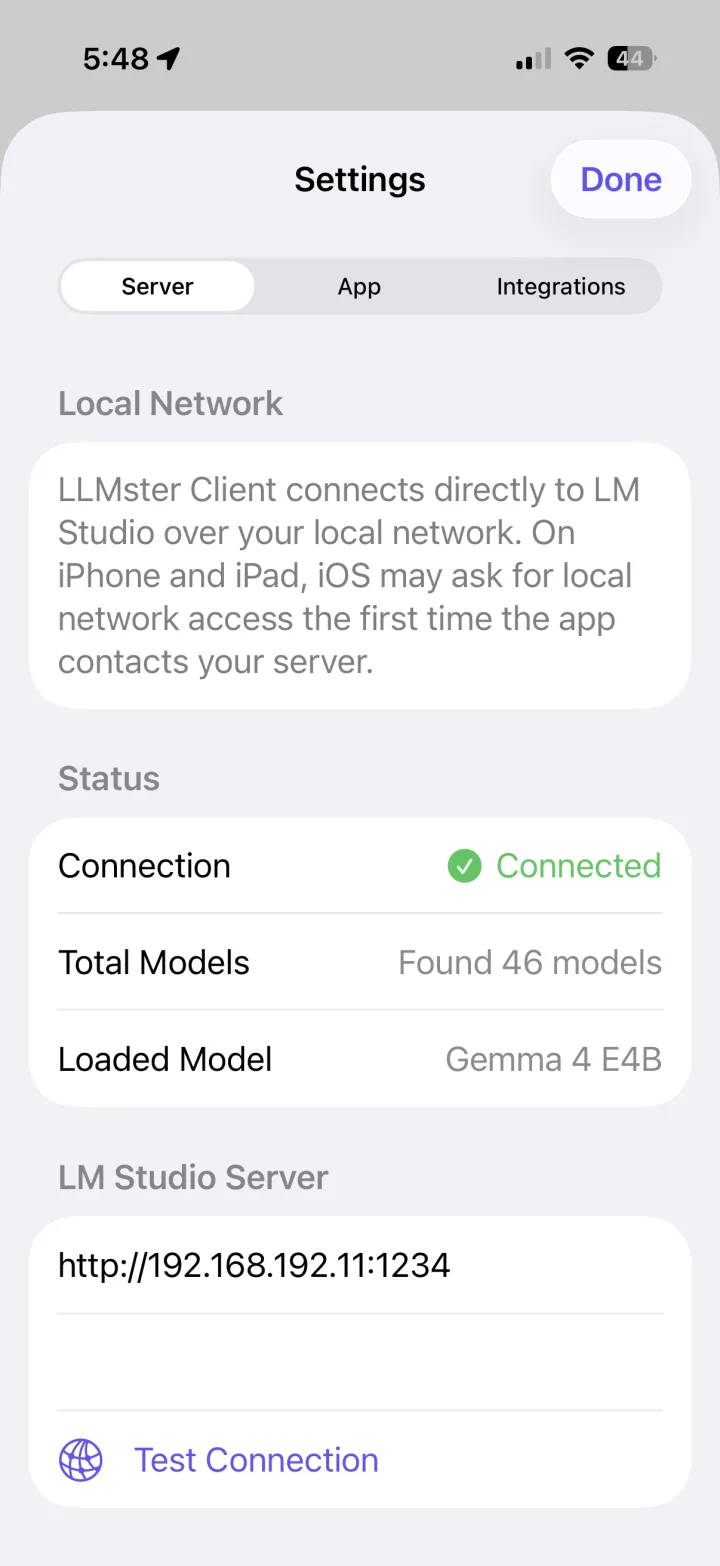
Auth Key sits just below Test Connection. It's a secure field, so iOS keeps it out of screenshots.
MCP tools,
ready to wire up.
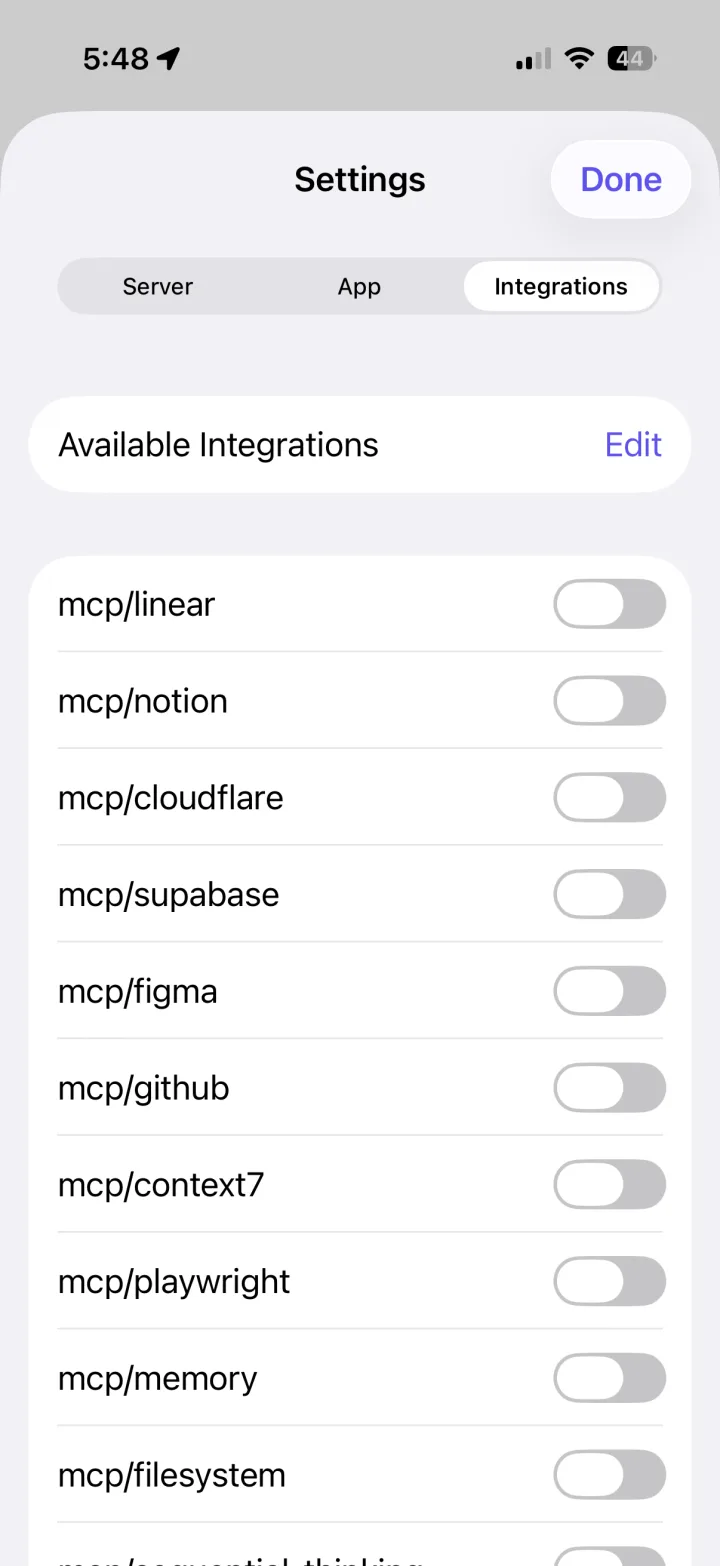
LLMster arrives with a curated list of popular MCP integrations already in place — so a capable model can look things up, query a database or file a ticket and show its work.
- Configure them on the server — each entry names an MCP server in LM Studio's mcp.json. Define the matching server there, then enable Allow calling servers from mcp.json (it needs authentication on) in Server Settings.
- Trim or extend the list — in Settings → Integrations, tap Edit to delete ones you'll never use, or add your own by its mcp/… id.
- Choose per conversation — each chat's settings has its own Integrations toggles, so a thread only gets the tools you switch on for it.
If something
won't connect.
Test Connection fails
Check that both devices are on the same network, that Serve on Local Network is on, and that the IP and port match exactly. If you turned on authentication, make sure the Auth Key in the app is the same token you created — a mismatched or revoked token reads as a failed connection.
The app can't reach the server at all
Make sure you allowed iOS's local‑network prompt for LLMster (Settings app → LLMster → Local Network). Also confirm the host's firewall permits inbound connections on the server port, and that LM Studio is bound to the network rather than localhost only.
An integration is on but the model never uses it
Three things have to line up: the MCP server is defined in the host's mcp.json, Allow calling servers from mcp.json is enabled in Server Settings, and the loaded model actually supports tool calls (the model picker marks which ones do).
Which models can I use?
Any chat model LM Studio can serve. For tool use or image input, pick a model whose capabilities include those — LLMster's model picker shows a badge for vision, reasoning and tools so you know before you load it.
Still stuck?
Email us and we'll help you get connected. For anything specific to the server itself, the LM Studio docs are thorough.